How To Crochet Christmas Baubles


These adorable Christmas baubles remind me of ornaments from years gone by. They stitch up quickly and add the perfect homemade touch to your Christmas tree.
Follow along to make your own crochet Christmas baubles! I'll list the pattern first and then go into more detail in the steps below.
Get more free Christmas Crochet Patterns for a lovely homemade Christmas!
Time required: 30 minutes
Difficulty: Medium
It's best if you have experience with crocheting spheres as well as increasing and decreasing.
Small Christmas Bauble Pattern
Find more detailed instructions and pictures below!
Make a Magic Ring (see below for video & tutorials)
R1: 6 sc into ring (6)
Pull the ring tight so it closes completely
R2: inc each st around (12)
R3: *inc, sc* 6 times (18)
R4 - 6: st 18 times around
R7: *dec, 1 st* around (12)
firmly stuff the bauble with toy stuffing
R8: dec 6 times around (6)
Measure 3-4 inches and cut off the remaining yarn
Pass the cut end through the last loop and pull it tight
Tie the end of the yarn to itself to make a loop and it's ready to hang!
1. Make a Magic Ring
(also called Magic Circle)
This is the best way to start any round crochet work. Check out this video to learn how to make a magic ring or find tutorials here.
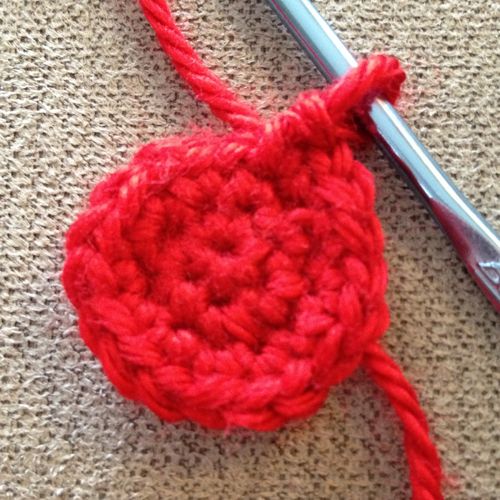
2. Increase
Round 1: single crochet 6 times onto the magic ring
pull the ring tight so it closes completely
Round 2: Make 2 single crochet stitches into each stitch around to make 12 stitches
Round 3: Do 2 single crochet stitches into the first stitch and then 1 single crochet into the next stitch. You should have 18 stitches
You are now done increasing and your piece should look something like the image - a small, flat disc.
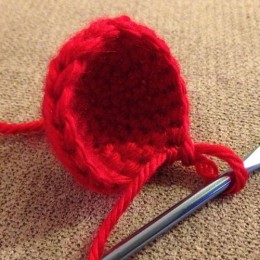
3. Round It Out
R4 - 6: single stitch 18 times around
Now you should have a tiny bowl. (pictured) This is the bottom half of your bauble. Now it's time to turn it into a ball!
Decrease and Stuff
R7: *dec, 1 st* around (12)
firmly stuff the bauble with toy stuffing
R8: dec 6 times around (6)
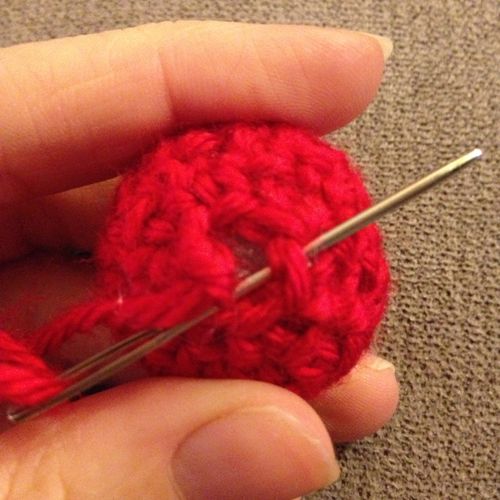
Measure 3-4 inches and cut off the remaining yarn
Pass the cut end through the last loop and pull it tight
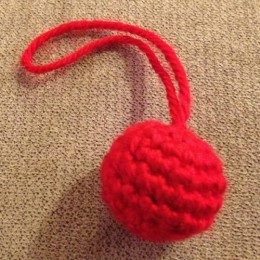
Create the Hanging Loop
A yarn loop is so much prettier than a standard ornament hook! Tie the cut end of yarn to itself to create a loop and your bauble to ready to hang!
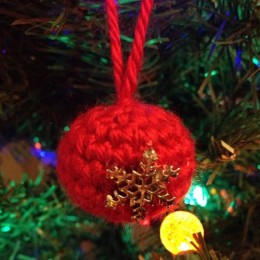
6. Decorate your Bauble
This step is optional:
Decorate your bauble with ribbon, sequins or buttons for added fun! I found these fun snowflake embellishments at Joanne's. I think they really add a special something when glued onto the baubles.
You can also change yarn colors halfway through the sphere to add a stripe (pictured above) to your bauble. I recommend making the sphere a little larger for color changes. Increase 1-2 more times and then add your color change into the rounds after increasing. (Step 3 Round It Out). Switch back to your first color for the rest of the pattern. You will need to add 1-2 more decreasing rounds depending on how much you increased in the beginning so that your bauble is a sphere instead of an oval.


